How to Create Images From Text Prompts in Minutes
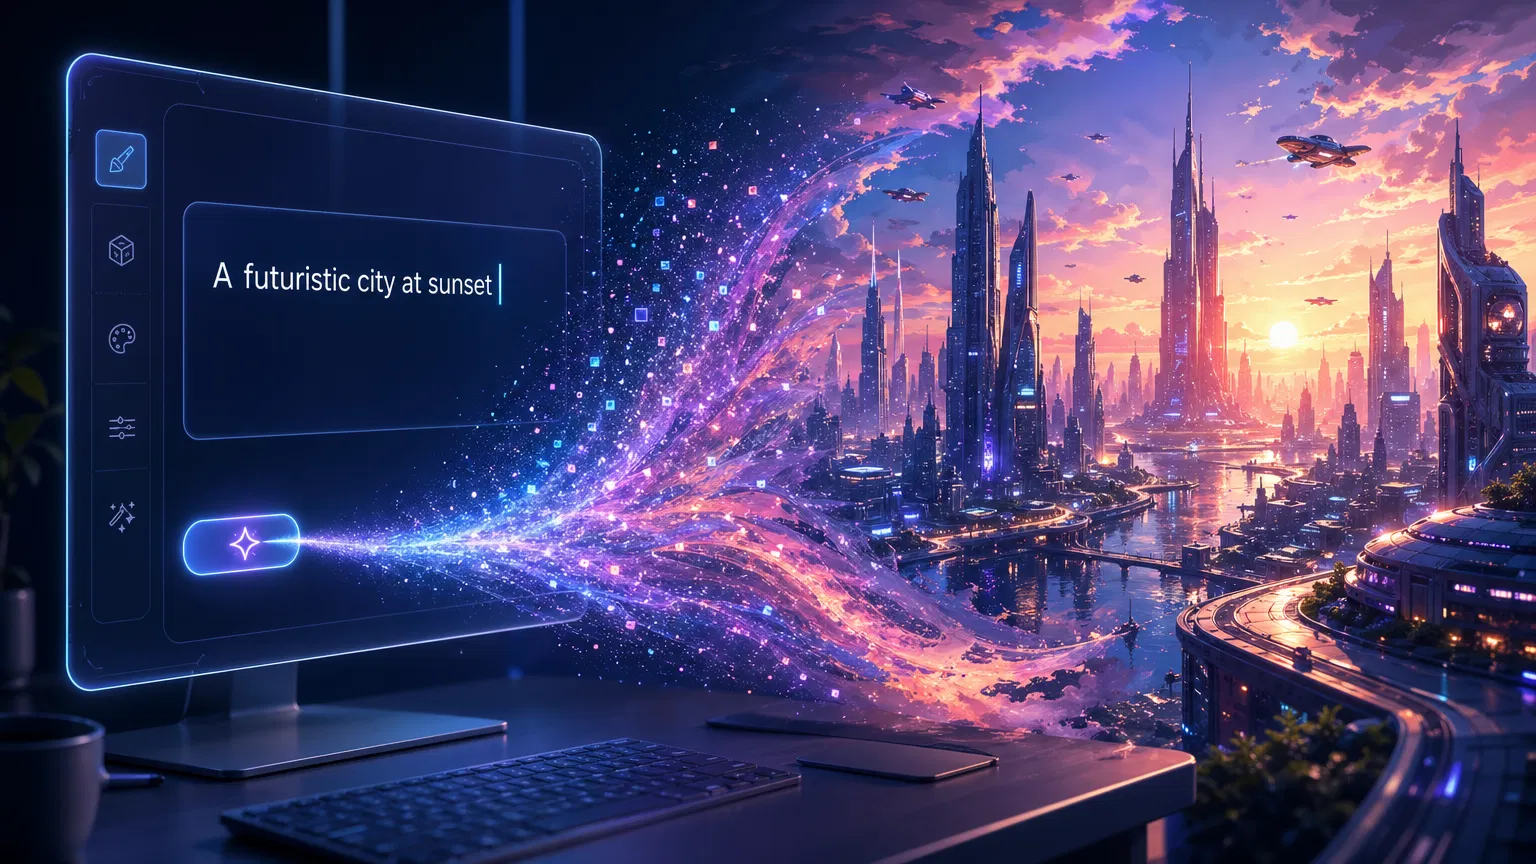
The ability to conjure high-quality images simply by describing them was once the stuff of science fiction. Today, thanks to the rapid evolution of artificial intelligence, it is a reality accessible to anyone with an internet connection. Text to Image AI generators have revolutionized the creative process, allowing individuals, regardless of their artistic background, to produce stunning visuals in a matter of minutes. Whether you need a unique illustration for a blog post, concept art for a game, or just want to explore your imagination, these tools offer unprecedented power and flexibility. This comprehensive tutorial will guide you through the process of creating images from text prompts, from understanding the basics to mastering the art of prompt engineering, ensuring you can bring your visual ideas to life quickly and effectively.
Before diving into the “how-to,” it’s helpful to understand briefly how these tools work. Text to Image AI models, such as DALL-E, Midjourney, and Stable Diffusion, are trained on massive datasets containing billions of image-text pairs. Through this training, the AI learns the complex relationships between words and visual elements. When you provide a text prompt, the AI uses this learned knowledge to synthesize a completely new image that matches your description.
The process typically involves a diffusion model, which starts with a canvas of random noise and iteratively refines it, guided by your text prompt, until a coherent image emerges . This generative approach means that every image created is unique, even if the same prompt is used multiple times.
Step-by-Step Guide to Generating Images
Creating your first AI-generated image is surprisingly straightforward. Here is a step-by-step guide to get you started:
Step 1: Choose Your AI Image Generator
The first step is selecting the right tool for your needs. The landscape of AI image generators is vast and constantly evolving, but several key players dominate the market:
•Midjourney: Known for its highly artistic, stylized, and often breathtakingly beautiful outputs. It operates primarily through Discord, which can be a slight learning curve for some users.
•DALL-E 3 (via ChatGPT or Bing Image Creator): Developed by OpenAI, DALL-E 3 is excellent at understanding complex, nuanced prompts and adhering strictly to the user’s instructions. It is highly accessible and user-friendly.
•Stable Diffusion: An open-source model that offers unparalleled control and customization. It can be run locally on your own hardware (if powerful enough) or accessed through various web interfaces (like DreamStudio or getimg.ai).
•Canva AI Image Generator: Integrated directly into the popular design platform, making it incredibly convenient for users who want to immediately incorporate generated images into their designs .
•Adobe Firefly: Designed with commercial safety in mind, Firefly is integrated into Adobe’s Creative Cloud suite and offers powerful tools for generating and editing images.
For beginners, Bing Image Creator (powered by DALL-E 3) or Canva are excellent starting points due to their intuitive interfaces and free access tiers.
Step 2: Craft Your Initial Prompt
The prompt is the steering wheel of the AI image generator. It is the text description that tells the AI what you want to see. A basic prompt can be as simple as a few words:
•Example: “A cute puppy.”
While this will generate an image, it leaves a lot of room for the AI to interpret the details (breed, setting, style). To get better results, you need to be more descriptive.
Step 3: Master the Art of Prompt Engineering
Prompt engineering is the skill of crafting effective text descriptions to guide the AI towards your desired output. A well-structured prompt typically includes several key elements:
1.Subject: What is the main focus of the image? Be specific. (e.g., “A golden retriever puppy,” “A futuristic sports car,” “A wise old wizard”).
2.Action/Pose: What is the subject doing? (e.g., “running through a field,” “parked on a neon-lit street,” “reading a glowing book”).
3.Setting/Background: Where is the subject located? (e.g., “in a sunny meadow,” “in a cyberpunk city,” “in a dusty library”).
4.Style/Medium: How should the image look? This is crucial for defining the aesthetic. (e.g., “oil painting,” “photorealistic,” “3D render,” “anime style,” “watercolor”).
5.Lighting: What kind of lighting illuminates the scene? (e.g., “cinematic lighting,” “golden hour,” “neon lights,” “soft studio lighting”).
6.Color Palette: Are there specific colors you want to emphasize? (e.g., “pastel colors,” “vibrant hues,” “monochrome,” “sepia tone”).
7.Camera/Perspective: How is the scene framed? (e.g., “close-up portrait,” “wide-angle shot,” “bird’s-eye view,” “macro photography”).
Putting it all together:
• Basic Prompt: “A cat in space.”
• Engineered Prompt: “A highly detailed, photorealistic close-up of an orange tabby cat wearing a futuristic spacesuit, floating in zero gravity inside a spaceship, with Earth visible through a large window in the background, cinematic lighting, 8k resolution.”
Step 4: Generate and Iterate
Once you have crafted your prompt, enter it into the generator and hit the “Generate” button. Within seconds or minutes (depending on the tool and server load), the AI will present you with one or more image variations.
It is rare to get the perfect image on the first try. The key to success with AI image generation is iteration.
•Analyze the Results: Look closely at the generated images. What did the AI get right? What did it get wrong?
•Refine Your Prompt: Based on your analysis, adjust your prompt. If the image is too dark, add “bright lighting.” If the style is wrong, change the medium keyword. If a specific detail is missing, emphasize it in the text.
•Use Variations: Many tools allow you to select one of the generated images and request “variations” of it. This tells the AI to create new images that are similar in composition and style to the selected one, but with slight differences.
Step 5: Upscale and Download
When you finally generate an image that meets your expectations, you will likely want to save it. Most platforms generate images at a relatively low resolution initially to save processing time.
Look for an “Upscale” option. This feature uses AI to increase the resolution and add finer details to the image, making it suitable for printing or high-quality digital use. Once upscaled, you can download the image to your device.
Advanced Techniques for Better Results
As you become more comfortable with basic prompt engineering, you can explore advanced techniques to gain even more control over the output:
•Negative Prompts: Some tools (like Stable Diffusion) allow you to use negative prompts. This is where you tell the AI what you do not want to see in the image. For example, if you are generating a portrait and the AI keeps adding glasses, you can add “glasses” to the negative prompt. Common negative prompts include “ugly,” “blurry,” “deformed,” or “watermark.”
•Weighting: You can assign different levels of importance to specific words in your prompt. For instance, if you want a red car but the AI keeps making it blue, you can increase the weight of the word “red” (the syntax for this varies by tool, e.g., (red:1.5) in Stable Diffusion).
•Seed Numbers: Every generated image is based on a random “seed” number. If you generate an image you like and want to make a slight modification to the prompt while keeping the overall composition the same, you can use the same seed number for the next generation.
•Image Prompts (Image-to-Image): As discussed in previous articles, many Text to Image tools also allow you to upload an existing image to use as a reference alongside your text prompt. This is incredibly powerful for guiding the composition, color palette, or style of the generated image.
Ethical Considerations and Best Practices
While AI image generation is a powerful tool, it is important to use it responsibly:
•Copyright and Ownership: The legal landscape surrounding AI-generated art is still evolving. Generally, images generated purely by AI cannot be copyrighted by the user. Be cautious when using AI images for commercial purposes, and always check the terms of service of the platform you are using.
•Bias and Representation: AI models can inherit biases present in their training data. Be mindful of this and strive to create inclusive and representative imagery.
•Misinformation and Deepfakes: Do not use AI image generators to create deceptive or harmful content, such as deepfakes of real people or realistic images of fake events.
•Attribution: While not always legally required, it is good practice to disclose when an image has been generated by AI, especially in professional or journalistic contexts.
Conclusion
Creating images from text prompts is a transformative skill that unlocks boundless creative potential. By understanding the basics of how these AI tools work, selecting the right platform, and mastering the art of prompt engineering, you can generate stunning visuals in minutes. Remember that the process is iterative—don’t be afraid to experiment, refine your prompts, and explore different styles. As AI technology continues to advance, the barrier between imagination and visual realization will only continue to diminish, empowering everyone to become a digital creator.
References
RENDER COMPLETE
Ready to make your own?
Join the creators already producing video at a scale traditional production can’t match.


Post Comment